One stop supplier of water treatment parts&accessories


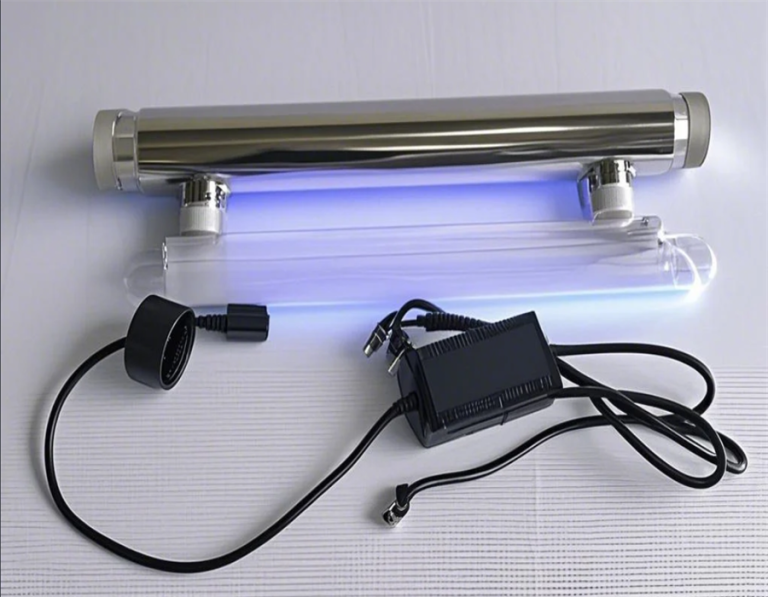
Best UV Sterilizer for Saltwater Aquarium (Top Picks for a Crystal Clear Tank)
So, I’ve been messing around with my saltwater aquarium lately, trying to get everything just right. One thing that kept bugging me was how to keep the water super clean and free of any nasty stuff. I did some digging and figured a UV sterilizer might be the way to go. Let me tell you, it’s been a bit of a journey, but I’ve learned a ton along the way.
Getting Started
First off, I had to find the right sterilizer. There are a bunch of them out there, and honestly, it was a little overwhelming. I started by reading reviews and watching videos online, just trying to get a feel for what’s what. I also hit up some forums where other aquarium nerds hang out. You wouldn’t believe the stuff people come up with!
Choosing the Right One
After a lot of back and forth, I narrowed it down to a few options. I was mainly looking at the wattage, the flow rate, and, of course, the price. I wanted something that wouldn’t break the bank but would still do a good job. I ended up going with one that seemed like a good balance of everything. It’s not the fanciest one out there, but it gets the job done.
Setting It Up
Once I got the sterilizer, the next step was setting it up. This was a bit tricky because I had to figure out where to put it in my system. I ended up placing it after my mechanical filter so that the water going through the sterilizer would already be pretty clean. I also had to adjust the flow rate to make sure the water was spending enough time in the sterilizer to actually get treated.
Figuring Out the Details
Now, this is where things got a bit more hands-on. I had to make sure all the connections were tight and that there weren’t any leaks. I used some zip ties to keep everything in place and make it look a bit neater. It’s not exactly pretty, but it works. Then came the moment of truth – turning it on. I watched it like a hawk for the first few hours, making sure nothing went wrong.
Seeing the Results
It took a few days, but I started to notice a difference in the water. It looked clearer, and the fish seemed happier. I also tested the water parameters regularly to make sure everything was stable. I did have to adjust the flow rate a couple of times to get it just right. It was a bit of trial and error, but I eventually got it dialed in.
Tweaking and Maintaining
Over the next few weeks, I kept an eye on things and made a few more tweaks. I cleaned the sterilizer a couple of times to make sure it was working efficiently. It’s not a set-it-and-forget-it kind of thing – you do have to put in some work to keep it running smoothly. But honestly, it’s worth it.
Here’s what I’ve picked up along the way:
- Start Slow: Don’t rush into anything. Take your time to research and find the right sterilizer for your setup.
- Placement Matters: Where you put the sterilizer in your system can make a big difference. I found that placing it after the mechanical filter worked best for me.
- Adjust as Needed: Be prepared to tweak the flow rate and other settings to get the best results.
- Regular Maintenance: Keep an eye on the sterilizer and clean it regularly to keep it working its best.
All in all, adding a UV sterilizer to my saltwater aquarium has been a great move. It’s made a noticeable difference in the water quality, and my fish are doing great. It took some effort to get everything set up and running smoothly, but it was definitely worth it. If you’re thinking about getting one, I say go for it! Just be ready to put in a little elbow grease and do some experimenting to find what works best for your setup.