One stop supplier of water treatment parts&accessories


How to Change Water Filter Cartridge Under Sink
How to Change Water Filter Cartridge Under Sink?When it comes to ensuring the quality and safety of your drinking water, having a water filter under your sink is a fantastic investment. However, maintaining this filter is crucial to its effectiveness. One of the most important maintenance tasks is changing the water filter cartridge regularly. In this guide, we’ll walk you through how to change water filter cartridge under sink step-by-step, ensuring you can do it confidently and efficiently.
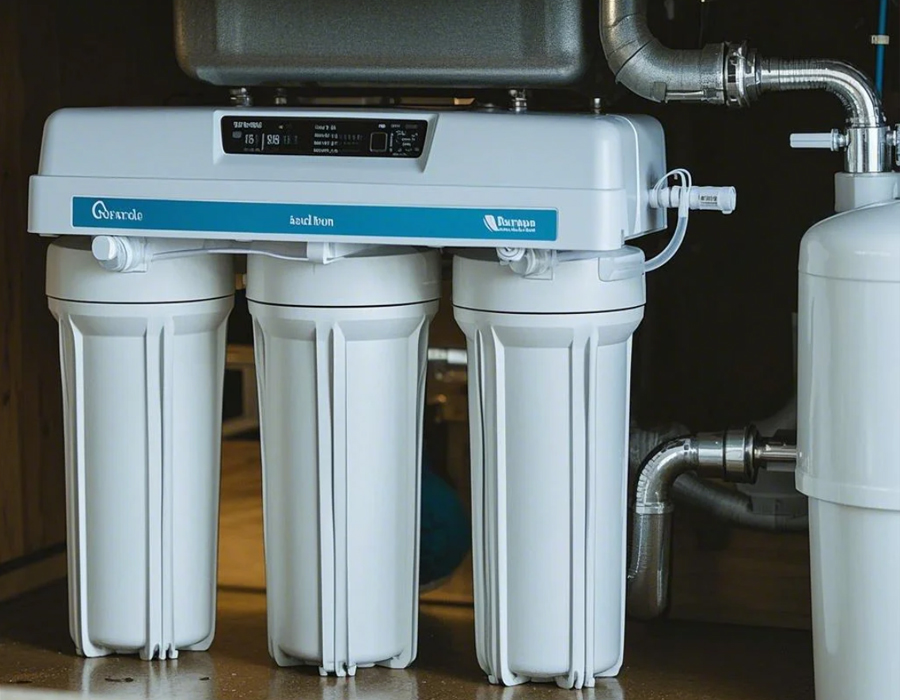
Understanding Your Under Sink Water Filter System
Before diving into the steps to change your water filter cartridge, it’s essential to understand your under-sink water filter system. Different systems have various types of cartridges, and some might have additional components. Typically, an under-sink water filter includes:
- The Filter Housing: This is where the cartridge is housed.
- The Cartridge: This is the filter media that removes impurities from your water.
- Shut-Off Valves: These valves control the flow of water to the filter.
- Supply Lines: These connect the filter to your water supply and faucet.
- Drain Line (if applicable): This is used for flushing or draining the filter.
Preparing to Change Your Water Filter Cartridge
Before you start changing your water filter cartridge, you need to prepare a few things to make the process smoother. Here’s what you’ll need:
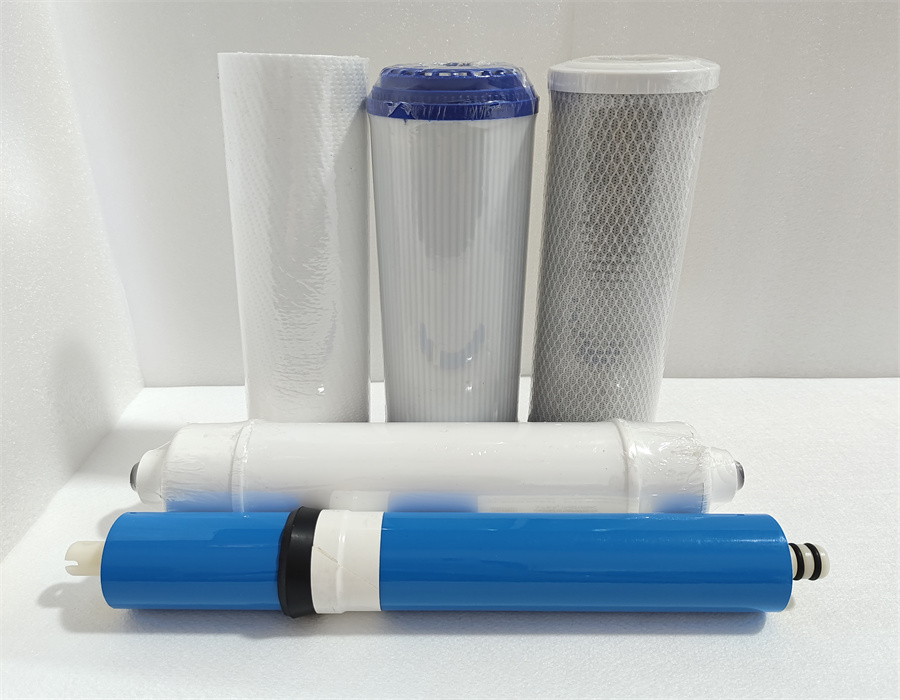
- Replacement Cartridge: Make sure you have the correct cartridge for your filter system.
- Towels or Cloths: These will help you catch any water that might drip.
- Bucket: To collect water that might drain from the system.
- Screwdriver (if necessary): Some systems might require a screwdriver to access the filter housing.
- Gloves (optional): To protect your hands from any dirt or debris.
- Flashlight (optional): If your filter is in a hard-to-reach place.
Step 1: Turn Off the Water Supply
The first step in changing your water filter cartridge is to turn off the water supply to the filter. Locate the shut-off valves connected to your filter system and turn them clockwise until they are fully closed. If your system doesn’t have shut-off valves, you might need to turn off the main water supply to your house.
Step 2: Turn Off the Faucet
After turning off the water supply, turn off the faucet that’s connected to your under-sink water filter. This will prevent any water from coming out while you’re working on the filter.
Step 3: Prepare for Water Drainage
Place a bucket under the filter housing to catch any water that might drip or drain out when you disconnect the lines or remove the housing. It’s always better to be safe than sorry!
Removing the Old Water Filter Cartridge
Now it’s time to get your hands dirty and remove the old water filter cartridge. Follow these steps carefully:
Step 4: Disconnect the Supply Lines
Locate the supply lines connected to the filter housing. These lines might be held in place by clips or compression fittings. Carefully disconnect these lines, making sure to catch any water that drips into the bucket.
Step 5: Remove the Filter Housing
With the supply lines disconnected, you can now remove the filter housing. Depending on your system, this might involve unscrewing the housing or removing clips that hold it in place. Use a screwdriver if necessary, but be careful not to damage the housing or any of the connections.
Step 6: Remove the Old Cartridge
Once the housing is off, you’ll be able to see the old cartridge. Carefully remove it from the housing. Some cartridges might have an O-ring or gasket that needs to be replaced. If yours does, make sure to note this and set the new one aside.
Installing the New Water Filter Cartridge
With the old cartridge removed, it’s time to install the new one. Here’s how to do it:
Step 7: Inspect the New Cartridge
Before installing the new cartridge, take a moment to inspect it. Make sure it’s the correct type for your filter system and that it’s not damaged or defective.
Step 8: Install the New Cartridge
Insert the new cartridge into the filter housing. If your system uses an O-ring or gasket, make sure it’s in place and properly seated. The cartridge should fit snugly into the housing without any excessive force.
Step 9: Reattach the Filter Housing
Now, reattach the filter housing to its original position. If your system uses screws, make sure they’re tight but not overtightened, as this could damage the housing or create leaks.
Step 10: Reconnect the Supply Lines
Reconnect the supply lines to the filter housing, ensuring they’re securely fastened. Use any clips or compression fittings that were originally there to hold the lines in place.
Flushing the New Water Filter Cartridge
After installing the new cartridge, it’s important to flush the filter to remove any air bubbles or debris that might be trapped inside. Here’s how to do it:
Step 11: Turn On the Water Supply
Slowly turn on the shut-off valves to the filter system, allowing water to flow back into the filter. Do this gradually to avoid any sudden pressure spikes that could damage the system.
Step 12: Open the Faucet
With the water supply turned on, open the faucet that’s connected to your under-sink water filter. Allow the water to run for a few minutes to flush out any air bubbles and debris.
Step 13: Check for Leaks
While the water is running, check all the connections in your filter system for leaks. Look for any drips or wet spots around the filter housing, supply lines, and shut-off valves. If you find any leaks, shut off the water supply and tighten the connections until the leaks stop.
Maintaining Your Under-Sink Water Filter System
Now that you’ve successfully changed your water filter cartridge, it’s important to maintain your under-sink water filter system to ensure its longevity and effectiveness. Here are some tips to help you do that:
Step 14: Keep Track of Filter Changes
Mark the date on your calendar or set a reminder on your phone to change your water filter cartridge regularly. The frequency of changes will depend on the type of filter you have and the quality of your water, but most filters need to be changed every 6 to 12 months.
Step 15: Regularly Inspect the System
Periodically inspect your filter system for any signs of wear or damage. Check for leaks, cracks, or rust, and replace any damaged components as soon as possible.
Step 16: Clean the Filter Housing
Over time, the filter housing can become clogged with debris and minerals. To keep it clean, remove the housing and soak it in a mild vinegar solution for a few hours. Rinse it thoroughly with water before reinstalling it.
Troubleshooting Common Issues
Even with regular maintenance, you might encounter some issues with your under-sink water filter system. Here are some common problems and how to troubleshoot them:
Problem: No Water Flow
If you’re not getting any water flow from your faucet, it could be due to a clogged filter or a problem with the supply lines. Check the filter housing for any debris or clogs and clean it if necessary. Also, inspect the supply lines for any kinks or blockages and replace them if needed.
Problem: Low Water Pressure
Low water pressure can be caused by a clogged filter, a partially closed shut-off valve, or a problem with the faucet. Start by checking the filter and cleaning it if necessary. Then, make sure the shut-off valves are fully open and that the faucet aerator isn’t clogged.
Problem: Leaks
Leaks can occur at any point in your filter system, including the connections, the filter housing, or the faucet. Check all connections for tightness and replace any worn-out gaskets or O-rings. If the leak persists, you might need to replace the affected component.
FAQs About Changing Water Filter Cartridge Under Sink
To help you better understand the process of changing your water filter cartridge, here are some frequently asked questions:
Q: How often should I change my water filter cartridge?
A: The frequency of filter changes depends on the type of filter you have and the quality of your water. Most filters need to be changed every 6 to 12 months, but it’s always best to check the manufacturer’s recommendations.
Q: Can I use a generic replacement cartridge?
A: While some generic cartridges might fit your filter housing, it’s always best to use the specific cartridge recommended by the manufacturer. Generic cartridges might not provide the same level of filtration or compatibility as the original.